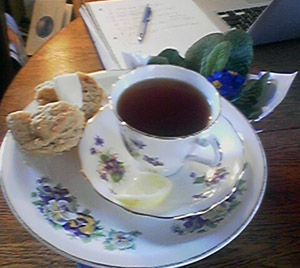
Saturday, March 4, 2017

Baked Sweet and Sour Chicken

Yes this sweet and sour chicken recipe is baked, and it is also sauteed. The oven time is almost an hour, but you can do something else while it bakes, so the recipe is versatile. It gets a two thumbs up for flavor, and now to the nutritional content. YOW we are talking A LOT of sugar here. I think it would be safe to say that most take out sweet and sour chicken has just as much sugar, and probably way more salt and fat. So if you would like to make some very tasty chicken, and you don't mind the fact that your dessert is in the middle of your main course, this is the dish for you! It is beautiful to look at as well, although I did not garnish my photos. Just sayin'. By the way, next blog I'm going to shoot off about 20 photos of each and every step that is so in vogue with bloggers. What's with that? That is so last week already, c'mon everyone.

I give credit to damndelicious.net (see below) for this recipe, I only upped the veggie factor, and didn't follow the instructions very well!

Ingredients
1 lb chicken breast meat (I used tenders) cut into 1" chunks
1/2 c. cornstarch

2 eggs, beaten, in a medium size bowl

vegetable oil for sauteing.

3/4 c. sugar
1/2 c. cider vinegar
1/4 c. ketchup (I used salt free)
1 TBS soy sauce (I used Kikkoman low sodium soy sauce)
I was supposed to add 1/2 tsp garlic powder, but forgot to, so I sauteed garlic with my veggie mix (see below).
Dredge the chicken in the cornstarch. I put all the chicken in a bowl with the cornstarch and stirred it up well.

Heat about 1/4 c. vegetable oil in a large skillet over med-high heat. The original recipe calls for dipping the chicken pieces one at a time in the beaten egg and placing in the oil. The chicken is cooked just until it is brown on the outside 3 or 4 minutes, and it won't be done on the inside yet.  Then the chicken is placed in a lightly oiled 9x11 baking pan. I quickly found myself tossing 4 or more pieces of chicken into the egg, and lifting them out, letting the extra egg drip back into the bowl before putting the chicken in the oil. I separated the chicken pieces from each other when they were ready to flip over (after about 2 minutes). When I got to the last 10 pieces of chicken I just threw it all into the beaten egg left in the bowl, and took the pieces out one at a time to put in the oil. I couldn't see any difference between the pieces when they went into the oven.


Before the chicken goes in the oven, the sauce ingredients are well mixed, and poured over all the chicken pieces. The chicken is baked at 325º, taken out every 15 minutes for a gentle stir-up and total baking time = 55 minutes, or until the sauce is thick and chicken is well browned.

The original recipe did not call for any vegetables. I feel a cumpulsion to add vegetables to any and every thing I eat, so while the chicken was baking I stir fried onion and sweet peppers in sesame oil with some added pressed garlic and chili flakes. Then, I don't know why, I also added some fresh pineapple chunks aka more sugar...

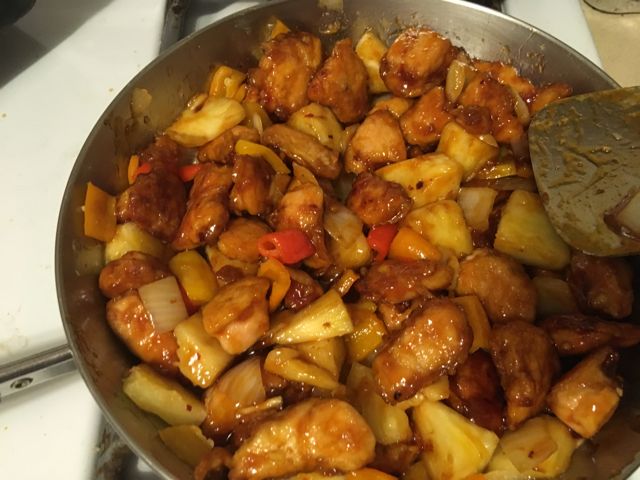


We had brown rice, in case you are wondering! Here is the link to the original recipe, which I believe is more organized than my version, and it contains nutritional facts as well.http://damndelicious.net/2014/01/18/baked-sweet-sour-chicken/

Saturday, October 27, 2012

Vegan Hot Dogs

Making my own vegan hot dogs.

Why, oh why, you might ask? Well, these hot dogs have a chewy consistency, and they are fun. A little like playing with Silly Putty. I will make a few changes next time, I think. This recipe is modified from one I tried on the site baked-in.

Read all the way through, for the connection to muffins.

Here is what I did - to make four large dogs.

I put these ingredients into a blender:
2 1/2 TBS almond meal (I grinded blanched almonds in my coffee grinder for this)
4 1/2 oz. extra firm tofu
1/2 TBS soy sauce
5 TBS water
1 1/2 TBS vegetable oil
1/4 diced smallish onion
1 clove of minced garlic
1/2 TBS smoked paprika (I got this from Penzey's spices a while back - very handy stuff)
3/4 tsp sugar
1/4 tsp ground black pepper
1/2 tsp ground mustard
1/4 tsp nutmeg
1/8 tsp cardamom
1/2 tsp cumin (not next time!)
Salt, to taste.
I blended everything for almost two minutes.

Then I added:
1/2 cup plus 1 TBS vital wheat gluten
1/2 tsp cornstarch
I mixed this all together, then kneaded it just a little.


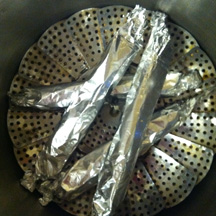
Then I cut it into 4 equal pieces, and rolled them into approximate hot dog shapes. I wrapped each dog in wax paper, then in aluminum foil, and twisted the foil ends shut.

I steamed the dogs in their packages, for 45 minutes. Then I let them cool down, uncovered. After that, I unwrapped them, and of course the wax paper was stuck to the dogs. I managed to get almost all of it off without wrecking them. I sauteed the dogs in a TBS of vegetable oil for about 10 minutes. I am not sure what that did to them, if anything. You can see where I cut off a taste before they went in the pan.


So, next time, I will use much less cumin. I might try some coriander instead. I might cut back on the smoked paprika, and add a TBS of regular sweet paprika. Also some ground celery seed.  And it would be nice to get a little more oil into the dogs. Maybe coconut oil. Also, I will first wrap them in parchment paper, not wax paper, which was my own cheapskate variation to begin with.

Anyway, they are good just like this, and are supposed to hold up to grilling, which would be a big plus over most vegan dogs.


OK, now. About those muffins. There is a great idea about corn dog muffins, with a recipe. Check it out here. I won't try to improve upon it. It is from Taste of Home, and the contributor, Lynita Arteberry is from South Dakota, so you know it has got to be tops. Just chop up the dogs, and throw them in.

Tuesday, October 2, 2012

Make Pizza, Not Muffins!

Turns out my blogs are just about food. I may start with a muffin concept, or an oatmeal concept, but when you get right down to it, they are about food in general.

This is an easy way to make a really quick dinner, without too many guilt pangs.
It starts with a frozen pizza. I usually buy an inexpensive plain cheese variety, and I do check the sodium content. Frozen pizzas are often notoriously high in sodium.


I keep a few of these frozen pizzas around for the evenings when making a meal "from scratch" is not going to happen.


I build a salad, or whatever tickles my fancy, on top of the cheese pizza. In the fridge this evening, I discovered half a box of mushrooms, a small bag of chopped kale I meant to use the other day, but forgot, a half a green pepper, and some cooked bulk Italian sausage. Also some leftover pasta sauce. I decided to slice a half an onion as well.


I cooked the cheese pizza for five minutes at 400º f, to give it a little start on its own, before doctoring it. Usually I pile the items of choice right on top of the cheese pizza. I decided to quickly saute the mushrooms and green pepper, sliced, for this meal. Then I popped it all in the oven for eight more minutes.


The pizza always looks better before it is cooked than after! Of course it tastes better after it is cooked, though. I usually grate a little extra cheese, and bake everything an additional five minutes. The cheese sort of "glues" everything down. My favorite cheese to use is swiss, because it is lower sodium than most cheeses. I only put an ounce or two on, and even people who don't think they like swiss cheese, seem to like the pizza.


It tastes like a pricey specialty pizza! You might be thinking that you don't have leftovers just sitting around to put on top of a pizza. Take a look, though. Many things work on a plain cheese pizza, from ham or cooked chicken and pineapple, to goat cheese and spinach. You can put raw spinach leaves right on top of the pizza, and they will cook up just fine. If you have frozen vegetables such as spinach or broccoli, thaw them in the micro, and squeeze the extra water out before putting them on your pizza. Thinly sliced raw garlic is great. I'll admit, this is not a purist's pizza, but it is fairly healthy and the more vegetables and/or fruit, the healthier. Yum.


Monday, July 30, 2012

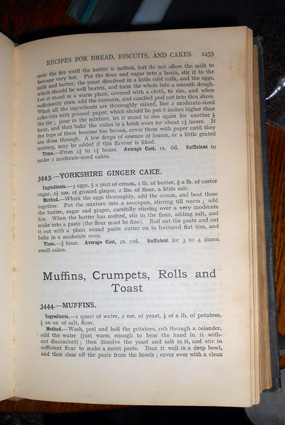
Beeton -OR- How Not to Write About Muffins


Moving from Child to Beeton. Well, that is apples and oranges, so I am just going to expose Mrs. Beeton for the misunderstood young woman she was. I don't think she ever wanted to write a book about cooking and managing. It was all about her husband.
Looks like she managed to squeak out a muffin recipe.
No one should even be allowed to write a cookbook until she is at least 68 years old. My grandmother never had that opportunity, but she would have written a doozy.


Just look at that bread mixing style. I know I did.

My mother has two other books she had better get out of her before the cookbook. I am not to cookbook age yet. Since I just made that up about being 68 a minute ago, I will admit I have composed several cookbooks which are currently out of print, including "Twelve Ways to Fix a Chocolate Cake," "On Edibility," and an untitled work with several muffin recipes in it. They are out of print because they never were in print. A lime green proof of the untitled work is sitting on the bookcase by the bathroom.
It is bursting with muffiness.


"On Edibility" is in random chapters inside this laptop somewhere, and "Twelve Ways to Fix a Chocolate Cake" is inside an OS9 mac.
I will find the parts pertaining to muffins and post them later.

Wednesday, March 14, 2012

Cheap Ones

These recipes are not mine. They belong to a collection titled "The American Frugal Housewife." Published in 1829, it is "Dedicated to Those Who Are Not Afraid of Economy."

The author, Lydia Maria Child, writes:
"Cup cake is about as good as pound cake, and is cheaper. One cup of butter, two cups of sugar, three cups of flour and four eggs, well beat together, and baked in pans or cups. Bake twenty minutes, and no more."

"There is a kind of tea cake still cheaper. Three cups of sugar, three eggs, one cup of butter, one cup of milk, a spoonful of dissolved pearlash, and four cups of flour, well beat up. If it is so stiff it will not stir easily, add a little more milk."


Mrs. Child's frugal writing style in this work was perhaps chosen to demonstrate that it used less ink than loquacious recipes.
For example, her use of the name "Mrs. Child" in this volume uses less ink than the above signature.

Staying off topic, I share two more recipes that may save you many dollars, if you use as much neosporin as we do in our house.

"An ointment made from the common ground-worms, which boys dig to bait fishes, rubbed on the the hand, is said to be excellent, when the sinews are drawn up by any disease or accident." And: "Nothing is so good to take down swellings, as a soft poultice of stewed white beans, put on in a thin muslin bag, and renewed every hour or two."

Not only that, but as soon as you have recovered, you can eat the beans, and go to the lake for a bit of fishing, using balls of worm ointment as bait. Don't forget to bring a few muffins along, for good measure.

Friday, March 9, 2012

Chocolate Muffins with Cream Cheese Polka Dots


When you make these muffins, you get two activities in one! A baking activity, and an arts and crafts activity – or rolling cream cheese "worms" with your hands.
The muffins are all about chocolate. They are just packed with chocolate flavor, and are finely grained, because of the olive oil and two eggs. So go to the kitchen and back to kindergarten at the same time.
The recipe makes six "Texas size" intensely dark, rich muffins.

Preheat the oven to 350ºF.
Grease the bottoms only of a 6 muffin "Texas size" muffin tin. Set aside.


Sift together into a 4 qt mixing bowl:
1 1/2 cups all purpose unbleached flour
1/2 cup packed brown sugar
1/4 cup white sugar
1/2 cup coca powder
2 tsp. baking powder

Sprinkle about a teaspoon of powdered sugar on your work surface. Roll out 2 oz of block, plain cream cheese into two ropes, each about 1/2" in diameter. Cut the ropes into 3/4" lengths and drop into the dry ingredients. Add 1/2 cup bittersweet chocolate chips or chocolate chunks to the dry ingredients as well. Gently lift and stir the chunks of cream cheese and chocolate into the dry ingredients.


Now whisk or beat together into a medium size mixing bowl:
1/3 cup mild flavored extra virgin olive oil
3/4 cup milk
2 eggs
1/2 tsp. vanilla extract


Pour the beaten ingredients into the dry ingredients. Stir together until just mixed.
Scoop equal amounts into each of the six muffin cups.

Bake the muffins for 35 minutes or until done. allow muffins to sit in the tin for 10 minutes before removing to a cooling rack. If you don't cut them open before serving these muffins, there is a polka dot  surprise inside!


Friday, March 2, 2012

Toothbrush Dollhouse Muffins


Doll size muffins for a tea. Actually, I was thinking more about an alternative to toothpaste when I put this recipe together. Something like "Just ONE muffin and your teeth are cleaner, brighter and healthier!" I am not sure if this is true or not. I will try it for a week and let you know. Kidding. I like my floss and toothbrush just fine.


Nonetheless, these muffins might be just the thing to end a meal, along with a carrot or an apple, if you forgot your toothbrush. Here is the recipe, which makes one 12 muffin (mini-muffins) pan. If you don't own a mini-muffin pan, double the recipe to make 12 regular size muffins.
The muffins are reminiscent of wholemeal barmbrack, an Irish bread made with currants, spices and tea – among other things.


Preheat oven to 350º F.
Put these dry ingredients in a medium size mixing bowl:
3/4 c. whole wheat flour
1/2 tsp baking powder
1/2 tsp. ground ginger
1/4 cup dried currants


Prepare a 12 muffin, mini-muffin tin by lining the tin with muffin papers.
Mix thoroughly in a small bowl:
1/4 cup cold strong brewed tea, either black or green tea, sweetened with a "friendly" sweetener such as stevia, xylitol or trehalose
2 TBS dark molasses
1 beaten egg


Place in a heat proof measuring cup or other container:
3 TBS butter (unsalted if you have it)
Heat the butter on defrost in the microwave, or set it in the oven, until just melted. I added green tea and butter together in the measuring cup, then heated them both. Anyway, the melted butter is mixed in with the rest of the liquid ingredients that are listed above. Mix the wet ingredients up thoroughly.


Pour the wet ingredients over the dry ingredients. Stir just until well blended.
Drop a heaping tablespoon of batter into each muffin cup. Use all the batter to fill the cups evenly.


Bake muffins for 15 minutes, or until the tops are firm to the touch.
Let the muffins cool in the muffin tin.


Now enjoy your beautiful, nutritious and tasty muffins.
Try these muffins with more butter, or whatever suits your fancy.
And Molly, you can come get your dolly tea set back anytime.


Saturday, February 18, 2012

Rich Lemon Nut Muffins

The Fiddling Magpie is being parceled out. Just like a real magpie nest! you are now in the muffin parcel.

This muffin recipe comes from mostly vegan days. Eggs, dairy, soy or almond, it has stayed on top of my mental muffin recipe stack and I doubt it will ever be displaced. Except possibly by two other recipes. You will have to come back for them, in the future.

7 oz. firm tofu
3/4 cup plain soy or almond milk
3 TBS non-dairy "cream" cheese, such as Tofutti® "Better Than Cream Cheese"
grated zest from one large lemon
1 tsp. lemon juice
pinch turmeric
Yes! Turmeric!


Blend all the ingredients listed above on medium speed until smooth, about 1 minute. The mixture will look a little bit like cake batter. Set aside.

Preheat oven to 350º f.

Lightly toast, in the preheating oven:
1/2 cup coarsely chopped pecans or walnuts, on a small metal pan
When nuts have cooled, place them in a large mixing bowl.
Add
2 cups flour
2/3 cups sugar
1/4 tsp. salt
2 tsp. baking powder
1/2 tsp. baking soda
Stir it all up thoroughly.

Place 1/2 cup butter, OR 1/4 cup butter and 1/4 cup shortening in a heatproof glass container. Melt butter, either by placing the container in the oven, or by microwaving on the defrost setting for two minutes.

Prepare a 12 muffin tin by greasing just the bottoms (not the sides) of the muffin holders.

Combine the three muffin components just before baking ( the melted butter and the blender batter to the dry ingredients). Scoop spoonfuls into the muffin tin. The batter will be thick and fluffy. It might look like there is too much batter for 12 muffins, but there isn't!

Bake muffins for about 30 - 35 minutes or until tops resist when lightly pressed.
Allow the muffins to cool in the pan for 5 minutes. Then remove by running a butter knife around the outside edge of each muffin, and lifting the muffins from the tin.

Enjoy with "cream" cheese and fruit topping of your choice. These muffins are a smash hit with people who think they don't like tofu or soy products.